Monday, July 4, 2011

Dogfish Head 90 Minute IPA Round 2


Round 1 of this beer was my best to date. I made some bad ones over the past months so decided to try this again, with some upgraded brewing equipment. I bought some "keggles" - keg/kettles - from someone. They are the best and cheapest way to get a stainless steel boil kettle and mash tun. Plus they are huge so no boil overs, and they help with efficiency (barley used vs. alcohol in beer basically).

A huge benefit of these new keggles is I'll be able to do 10 gallon beer batches instead of my usual 5...but I'm not confident enough to do that much yet. I need to make sure it's going to be good before I take that leap.

New mash tun and boil kettle


Thermometer and ball valve built into each keggle

This was my first time using spring water to brew. I think my tap water was producing some off flavors, maybe related to chlorine or calcium. My City does a very lazy water report so I can't tell what's really in it. Best solution rather than additives like gypsum - just buy spring water.

Spring water and yeast starter with Wyeast Whitbread 1099 yeast

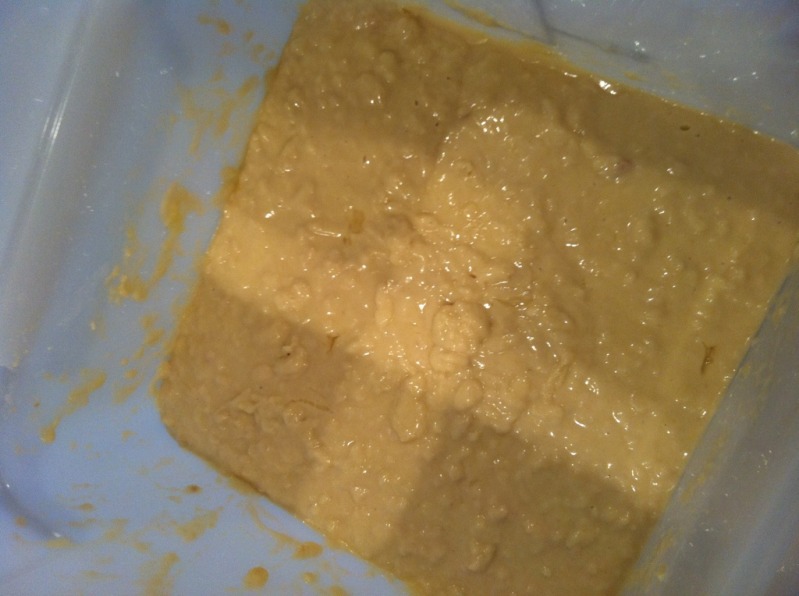
Time to mash in with 18 lbs of barley: Pilsner and British Amber 60L.


New mash tun ready to add water


Mashing in


Add hops and boil for 90 minutes


After the wort is cooled, aerate and siphon to glass carboy. I usually use a plastic fermenter but had some issues, these should allow less chance for bacteria I hope.


Adding yeast starter slurry to wort

The things I did differently this time than my last 10 batches or so:

1) Use new keggle equipment for boiling and mashing. This allows less chance for boil over (15.5 gallon container vs. previous 8 gallon boil pot), more temperature control with built in thermometers, better efficiency due to quality false bottom and pressure pushing wort through the keggle.

2) I used a 6.5 gallon glass carboy as primary fermenter. I think the plastic one I like to use may be scratched, less air tight, and it's hard to clean since you're not supposed to scrub/scratch it. The last batch I made I had to toss - it tasted like plastic - a problem due to heat and cleanliness...even after all that sanitizing.

3) I'm fermenting the carboy of wort and yeast in a refrigerator in the garage. I bought an old refrigerator mainly for this purpose. It needs to stay at 68-70 degrees. I'm using a regulator on the refrigerator which keeps it the right temperature. The last batch had the "fussel" / gasoline type of flavor that is a result of fermenting too hot (room temperature - 76 to 80 degrees).

4) I used a yeast starter - sometimes I don't due to time but I made sure to this time.

Let's hope it was worth the trouble...or at least that it will be soon enough on the next few batches. All grain brewing can be a tough science for the weekend brewer.

This batches specs:

1.072 OG (supposed to be more like 1.086 but should be ok)
1.018 target FG
Target Alcohol by Volume: 7.25%

This is less ABV than the recipe intends (9%) but should still be good. I blame the new mash tun and using a bit too much water. I should know for next time. Cheers.

Sunday, March 6, 2011

Qu'ils mangent de la brioche

I recently returned home from a visit to my parents house. Of course, I wanted to bring some bread along. I wanted to bring something really special, so I made up a batch of brioche dough. 

This was my first try at brioche dough. It's more involved then the typical bread dough. It has eggs and butter. Lots of eggs and butter. Normally when I mix up dough, I have a helper. This time was no exception!

Mix master Jack.

He helped me count out the cups of flour and mixed the dough as I added more. When we were finished, we had a very soupy dough that looked like this.

Brioche soup. 

The recipe said the dough would be very soft, so I set it aside to rise. It rose and seemed to be a bit less soupy. I chilled it for 2 hours, then went to shape a loaf. I couldn't get it to form a ball. It was dripping between my fingers like slime. I plopped it in to the brioche pan and consulted my cook book. The recipe mentioned how easy brioche dough was to work with once it was chilled. I started to think something had gone wrong. 

 This is supposed to be in a ball-ish shape.

Clearly there was not enough flour in the dough. I began adding flour a bit at a time, then a lot at a time. I think I added about a cup and a quarter more flour, and then I had a somewhat normal dough. I think two things happened. Firstly, I think my "helper" who was counting out the cups as I measured the flour, missed a cup. Secondly, I always bake with bread flour, which normally means that you decrease the amount of flour a recipe calls for by about 1/4 cup per 6 cups. I did this with the brioche dough, but there is so much liquid in the brioche dough, it negates the need to decrease the amount of flour when using bread flour.

I incorporated so much flour that I had worked most of the air out of the risen dough, so I set it aside and let it rise for two more hours. It rose back up and was much easier to work with when it contained the proper amount of flour!

Pre-proofing. Much less sloppy!

Post-proofing, this dough loves to rise!

It baked up beautifully. Great oven spring, gorgeous crumb. The egg wash I put on right before baking gave it a gorgeous shine. The flavor and texture is somewhat croissant-like. It's amazing with butter and jam.

Shiny! 

Brioche crumb.

I made enough dough to make a loaf of brioche bread, as well as three more delicious pastries using brioche dough. You'll have to check back tomorrow to see what else I made!

Saturday, March 5, 2011

Angry Amber

I went on a work trip for 2 days and left beer brewing on my kitchen counter in a 5 gallon glass carboy. I made a mistake and over oxidated it. I put the airlock on wrong too apparently. I arrived home from my 2 day work trip and found that it had exploded up onto my ceiling from my kitchen counter! Should have snapped a pic but was too pissed having to scrub and the re-paint the ceiling. Most of the beer was still left in the carboy once the CO2 cleared...so this one will be named Angry Amber because of the yeast explosion (and me painting away dammit). I don't think it's ruined but we'll see!

10 lbs 2 Row Pale, 10 oz. 40L Crystal, 1/2 oz. Peated Malt, 1/2 oz. Roasted Barley


Yeast (Northwest 1332) and Hops (Northern Brewer and Cascade)


Siphon to primary fermenter

Angry Amber


The 1/2 oz. peated malt is something different. This is a U.S. Amber but peated malt is smoky and more Scottish, so it's supposed to have a "Scottish Accent."

Saturday, February 26, 2011

German Shenannigans

It's 70 degrees on a Saturday...time to make something for Spring.

Getting ready to make some Hef...no, not like Playboy. Hefeweizen.


Mash for 90 minutes then boil for 90 minutes. This shot shows when the proteins get so hot they boil over, so you have to spray water or blow on it..until they are hot enough and sink back to the bottom. "Hot break"

After cooling the wort add some of these sadistic sugar monsters.


Aerate and then pitch the yeast in a fermentor, seal with an airlock. Airlocks allow CO2 to be formed in the fermentor without blowing the thing up. A beersplosion would be a party foul. CO2 escapes through a water or sanitizer seal...that thing on top that looks like it comes in a chemistry set for kids.


After a couple of weeks, into a keg and carbonate, then put it in my 3 tap kegerator. I just replaced the single tap with a 3 tap...variety is nice. Right?

Hefeweizen is a German wheat beer. Residents of Munich are said to drink 75 gallons of beer per person per year and in the summer a good part of that is Hefeweizen. Oh well...it's spring but in Texas that's hot enough for some light beer. Hef is a light golden beer with an off white head with hints of citrus and banana. It's often served with a slice of orange. 2 weeks til drinkability...I think this one is going to be great. Expected alcohol content 4.5%, average to low compared to many beers...and I thought the Germans could drink. I think I'm part German? Speer drinks beer, ya that sounds right.


Friday, February 25, 2011

Dogfish Head 90 Minute IPA Clone


To continue from my last post...so far the nut brown is not that great, a little too heavy and almost like a porter. The Irish Red turned out really good, still a little heavy but good flavor. But neither are quite our favorite style.

Nut Brown 4.8% Alcohol


Irish Red 5.1% Alcohol

I made a 90 minute IPA last weekend and found out what 90 minute means...90 minute boil instead of the more typical 60 minutes. Here's what makes an IPA taste so strong and bitter...about 5x more hops than a lot of beers. Hops come as whole hops, in smaller pieces, or in pellets and my brew shop only has them in pellet form. This is a blend of 3 types.


Also this IPA recipe called for about twice as much barley as the other beers I've made, about 15 pounds! Ready for mashing...when 152 degree water is added for an hour. This is after it has gone through a mill to crush every grain to get full flavor.


After mashing, I drained it into the boil pot, and then sparged (refill the mash tun with hot water, aka ice chest full of barley) to collect 7 gallons of wort...beer before yeast is added. Then boil for 90 minutes adding hops every 7.5 minutes. I took a hydrometer reading of 1080 after cooling the wort. Then into the fermenter and after 3 days, the reading is 1015. So the difference is 65, divided by 7.46, which is 8.7% alky-hol. Those little yeast bastards totally ate the shit out of that sugar (which makes CO2 and alcohol as byproducts). Probably because I used two packs of yeast...200 billion yeast cells. Next time I will try a yeast starter which you can make at home, instead of spending an extra $8 on yeast.

Next step: rack (syphon) to a secondary fermentor to get the beer off the yeast at the bottom of the fermentor, then keg, carbonate, chill and get drunk off 2 glasses. Only about 315 calories per 12 oz glass! That's some nice alcohol content....let's see how it turns out. I tried it off the fermenter and it's good and bitter. Becca says fruity too. I think that's from the yeast strain from the recipe..."fruity esters."

Tomorrow I'm brewing up a hefeweizen from a Paulaner clone...basically 5.25 lbs german wheat malt, 4.75 lbs 2 row pale malt, and bavarian yeast. It should finally be a lighter more drinkable beer than my first three attempts...something for the ladies..er, my wife. Time to drink somethin'. It's Friday night.


Wednesday, February 23, 2011

Olive you!

Last week I made olive oil dough, and we made home made pizzas for dinner. They turned out great, but we were so busy eating them that I didn't snap a picture. I also made focaccia, which is similar to the prep for the pizza dough, but topped with a drizzle of olive oil, some rosemary and a sprinkle of sea salt.

To use up the rest of the olive oil dough, I just formed it into a boule and baked it as I would a normal boule. It yielded a gorgeous, moist bread. The crust was chewy and satisfying to bite in to, but not super crusty. It would have made gorgeous sandwich bread, but we ate the whole loaf plain, or dipped in olive oil, before we had the chance to make a sandwich.

Olive oil dough boule,

Olive oil boule crumb.

Because the olive oil dough is so versatile, I think it will be a staple in my kitchen. It can be a pizza, focaccia, boule/sandwich bread, or you could toss in some kalamata olives and make kalamata olive bread. Which, of course, I did! The recipe stresses to use the best quality kalamata olives you can find. Your best best is probably a fresh olive bar at Central Market or the like. This bread also benefits from a high quality, flavorful olive oil. 
Kalamata olive bread.

Kalamata olive bread, crumb.

I went to Ace Mart restaurant supply today and picked up some more fun equipment, then headed over to Sprouts for ingredients. I think the one I'm going to make next is brioche! 

Monday, February 21, 2011

Ciabatta

Ciabatta means slipper, and gets the name because of its shape. I've done a couple loaves of ciabatta now. It's supposed to have nice, big air pockets inside. It's wonderfully chewy. We enjoyed some with penne and pesto last night, and again for lunch today.

My first try at a new type is always a learning experience. My first ciabatta was a bit sunken in the center. It was still tasty, I brought it to Bunco along with some sun-dried tomato bruschetta and it was gobbled up!

First attempt at ciabatta

2nd attempt had a better shape.

A look at the crumb. Nice big air pockets.

My ciabatta is made from the same dough as the boule. It's amazing how the same dough can yield a different type of bread when shaped and cooked differently!

Saturday, February 19, 2011

How we began baking.

I've always LOVED bread. Not sliced sandwich bread, but gorgeous crusty, chewy artisan breads. Sourdough, hard rolls, baguettes, I could eat it for every meal.

I had tried my hand at baking bread at home on occasion, both by hand and with a bread machine. I was never excited about the results. The loaves were usually dense, and lacked the chewy crumb and crisp, caramelized crust that just *makes* a good loaf of bread. Not only were the results mediocre, the process was somewhat labor intensive and uninspiring to me. I've never been much of a cook. I resigned myself to getting my kicks from the bakery section at Central Market.

I saw a thread on www.thebabywearer.com that was dedicated to a technique of baking from the book, "Artisan Bread in Five Minutes a Day." The thread provided a link to the master recipe and instructions from motherearthnews.com. The thread on thebabywearer had many replies raving about the success they had thanks to this technique. My interest was piqued.

The master recipe contains only four ingredients, flour, water, yeast and salt. I had all the ingredients and supplies in my house, so I decided to give it a whirl. My first attempt at the boule wasn't perfect, but it was delicious. And it was chewy, and crusty, and amazing. I could not BELIEVE I made it myself, in my own kitchen, and it was so simple to do. I was hooked.

My first attempt at an artisan boule.

A subsequent attempt.

Since then, I've baked a loaf, sometimes two, every day. I've branched out in to different variations and techniques. It's an adventure, and normally my first attempt at a new variation isn't as pretty as it's supposed to be. But they have all, with the exception of one fail, been delicious!

If you'd like to give it a try yourself, the master recipe can be found here. If you make it, let me know how yours turns out!

How we began brewing.

I received a Cooper's Brewery Micro-Brew Kit for Christmas 2010. Becca and I have both always enjoyed good beer. The Cooper's kit comes with a Lager mix, so that was my first homebrew. I enjoyed making it and quickly followed it with a Cooper's IPA.

The bad news is that Cooper's mixes didn't produce very tasty beers, so I decided to give all-grain brewing a try. Using a kit (extract brewing) versus all-grain brewing is kinda like baking a cake from a mix versus from scratch. There's a local store in the area, Homebrew Headquarters, that sells the grains and other ingredients and supplies for all-grain brewing.

I chose a nut-brown ale to start.
Large boil pot, hop sacks, equipment.

Mashing. 152 F degree water extracts sugars from 7.5 lbs pale malt, 1 lb crystal malt, and 0.3 lbs chocolate malt.

Boiling wort with hops added in hop sacks.

Cooling the wort (beer without yeast or fermentation). Cool to 70 degrees F before fermenting.

Hydrometer reading of pre-fermented beer after sealing in fermenter with air lock. 1050 original gravity reading...perfect, water is 1000. So final gravity should be around 1005 to 1015, equating to about 5-6% alcohol.

I put the Nut Brown into a "corny keg," which is a 5 gallon keg that used to be used for soda systems until boxed soda became more popular. They are cheap now due to being obsolete and used mostly for home brewing. We bought a kegerator with a single tap and I changed it out to a triple tap...so now we have 3 beer choices on tap.

I force carbonated the Nut Brown to 40 psi for 15 minutes and let it sit over night and chill at 20 psi. The next day, down to 15 psi and left it hooked up to the carbon dioxide tank. We pulled the tap and poured it into a cold glass...not bad. Not amazing but tasted like real beer instead of Cooper's crap. It almost tastes like a beer you'd get at B.J.'s, a local restaurant and microbrewery.

So far I've also made an Irish Red for St. Patty's, which is ready almost a month early, and I just put it into a keg tonight and carbonated it... waiting for it to cool and taste tomorrow! We tried it warm and flat tonight just for fun....Becca said it tastes like cherries. Tomorrow we'll see...

Friday, February 18, 2011

Hello there...

We started this blog to document our experiences as we learn to homebrew beer and bake artisan bread!